Step By Step Guide to Set Up Finale Email Countdown Timers
This plugin takes the functionality of Finale beyond WooCommerce Product Pages. This add on generate a dynamic countdown image which is in sync with countdown timers of the campaign.
You can embed this image anywhere including emails, blogs post, landing pages or any marketing campaign etc.
Finale Email Countdown Timer is available on middle or higher plans.When you buy these plans, seperate plugin files will be available in your XL PLugin's account.
Follow these steps to set up Finale Email Countdown Timer after you have downloaded and activated the plugin.
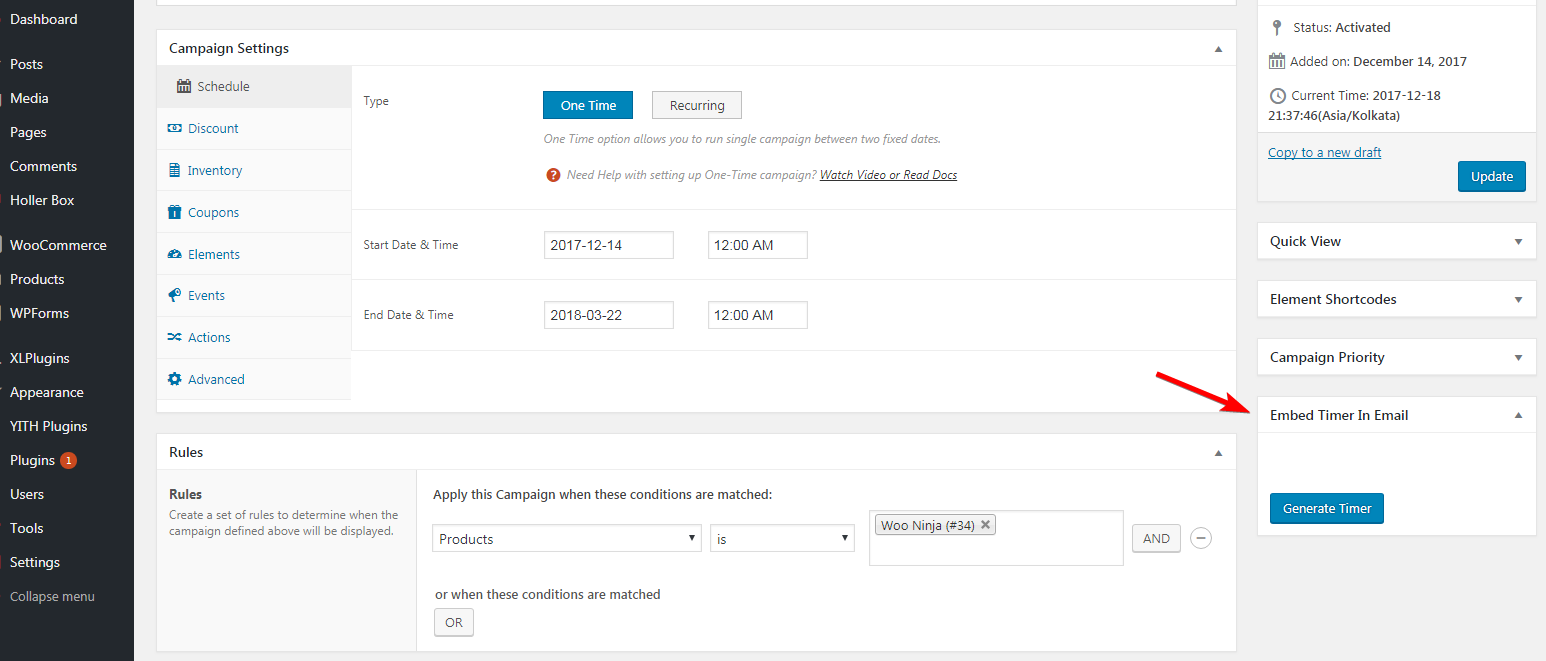
Step #1: Open the Finale Campaign which has Countdown Timer enabled. Look for ‘Embed Timer in Email’ meta box on the right side.
Step #2: Click on Generate Timer button to create or modify email timer data.
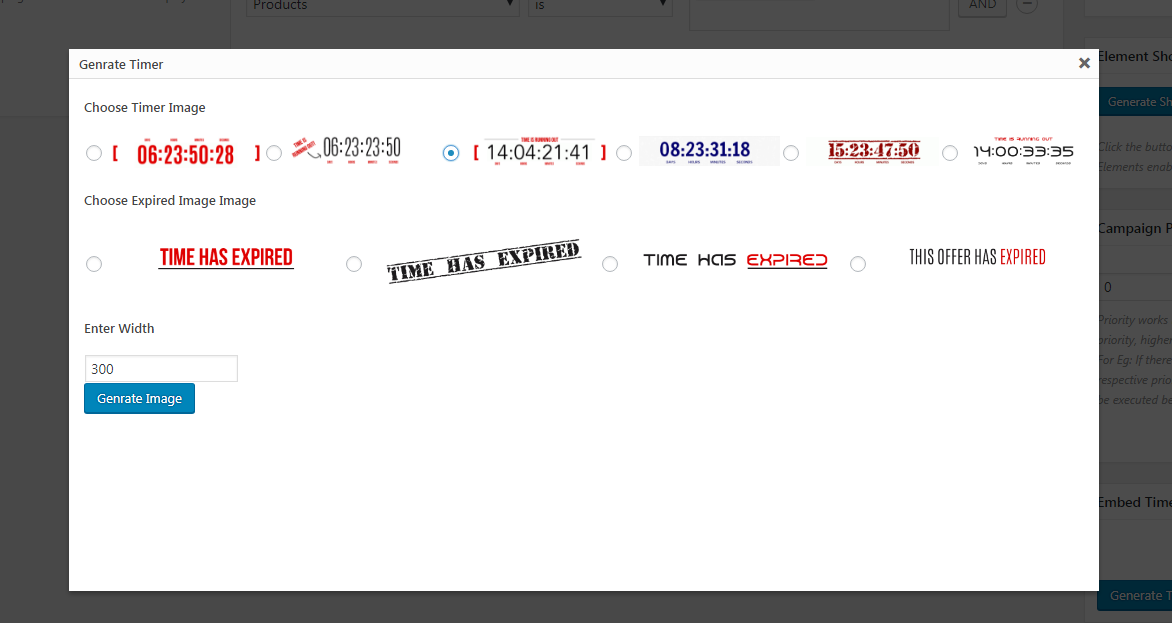
Step #3: Here you can see all the timer image patterns, choose one. Leave width to default 300 and hit ‘Generate Image’ button.
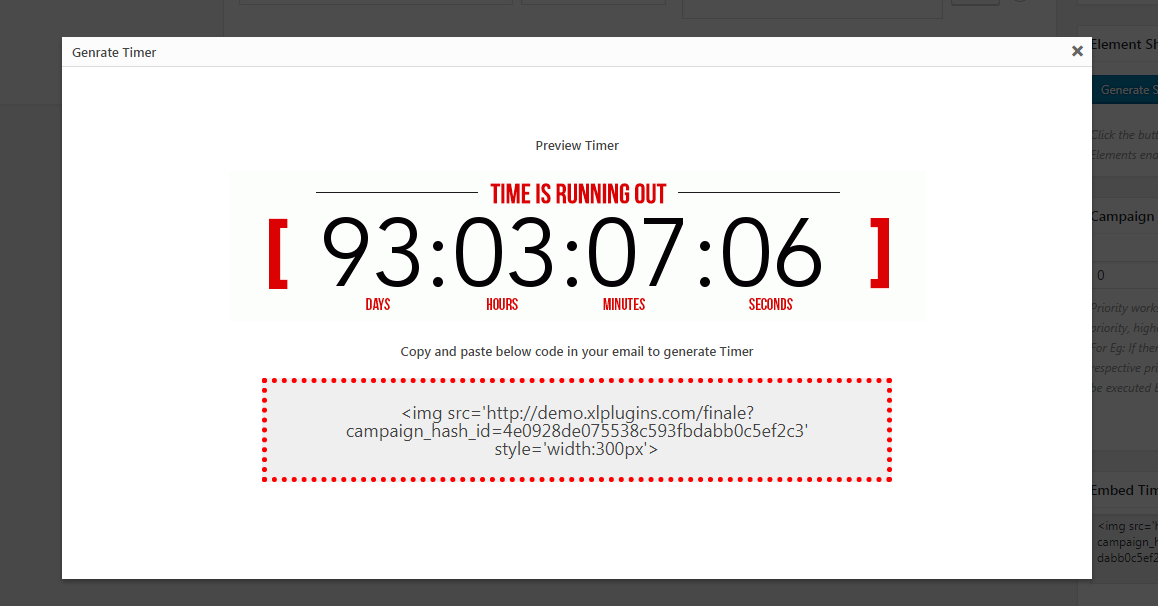
This is the live preview of your timer. And below is the ‘img’ embed code for email.
Step #4: Copy the code an embed it in your email
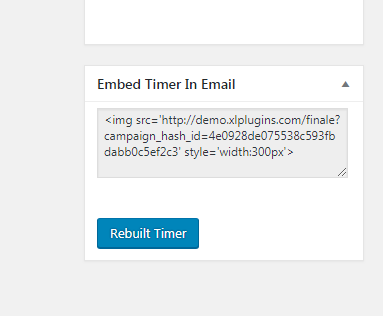
Note: After generating timer first time, you can copy the embed code from the sidebar as well. Also, if you want to modify the email image, click on ‘Generate Timer’ again.
Note: This plugin generates images on the fly. It has text for HRS, MINS & SECS. It is fixed and cannot be changed.