To show counter bar Finale Inventory Should be turned ON.
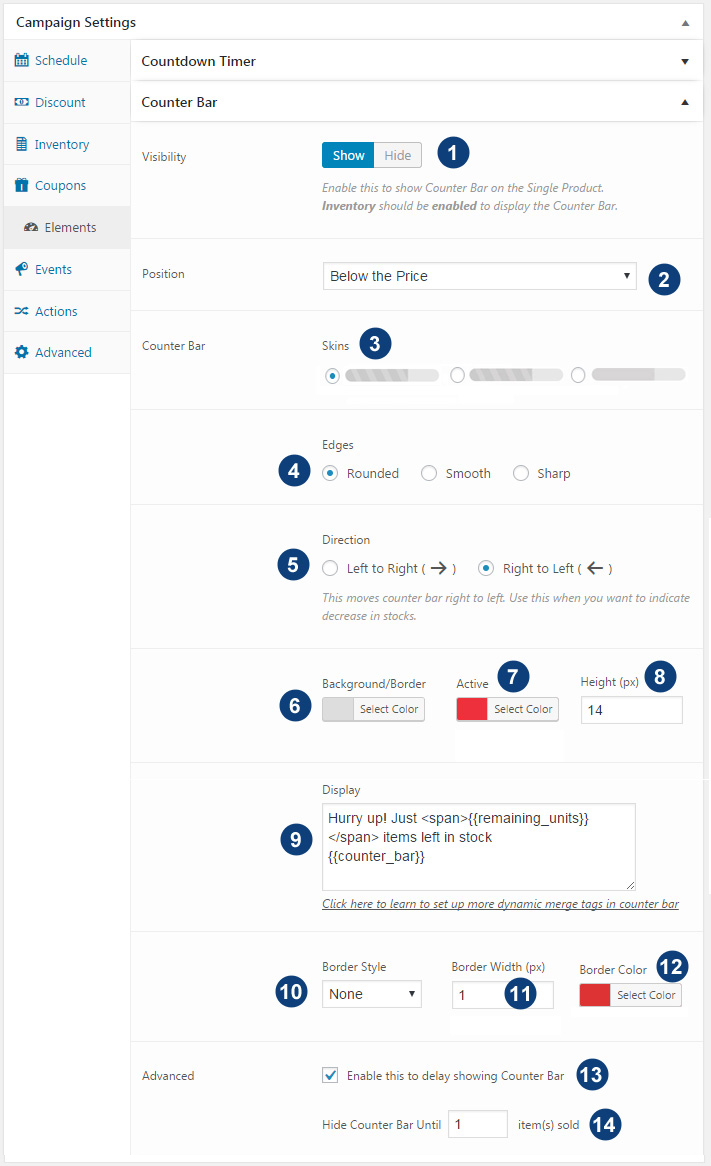
- Enable this to show Countdown Bar on the single product. Note counter bar is only shown when Inventory Goal is set up in Deals
- Select the position to display Counter Bar on your WooCommerce product page
- Choose the Skin to Counter Bar
- Edges of counter bar can be set to Rounded, Smooth or Sharp
- Background Color of the counter bar
- When counter increases the bar increases.Set the color of the counter bar.
- Height of the counter bar
- Display Text Area. It uses merge tag {{counter_bar}} to display the countdown timer as per above-configured settings.You can add your own custom text to display above or below the timer.
- {{total_units}}
Outputs total quantity to be sold during the campaign. Example, Total Units: 10 - {{sold_units}}
Outputs total quantity sold during the campaign. Example, Currently Sold: 5 - {{total_units_price}}
Outputs total price value of total quantity to be sold during campaign. Example, Total Funds To Be Raised: $100 - {{sold_units_price}}
Outputs price value of quantity sold during the campaign.Example, Funds To Raised Till Now: $50 - {{sold_percentage}}
Outputs percentage of quantity sold during the campaign. Example, Campaign Goal: 51% achieved - {{remaining_percentage}}
Outputs percentage of remaining quantity left during the campaign. Campaign Goal: 49% left
- {{total_units}}
- Border Style: Leave it to None in case you don’t want any borders
- Border Width (px)
- Border Color
- You can delay showing of counter bar till few sales are enabled.Enable this option.
- And enter number of sales after which you want Countdown Timer to appear