Savings trigger is used to show savings (in absolute number and percentage ) on discounted products.
Basic Setup
You need to have this basic setup to configure the ‘Savings’ trigger.
Step #1: Activate the Savings trigger
Go to WooCommerce > Settings > Sales Triggers: XL Plugins
Hover your cursor over the Savings trigger and hit the ‘Activate’ button to activate it.
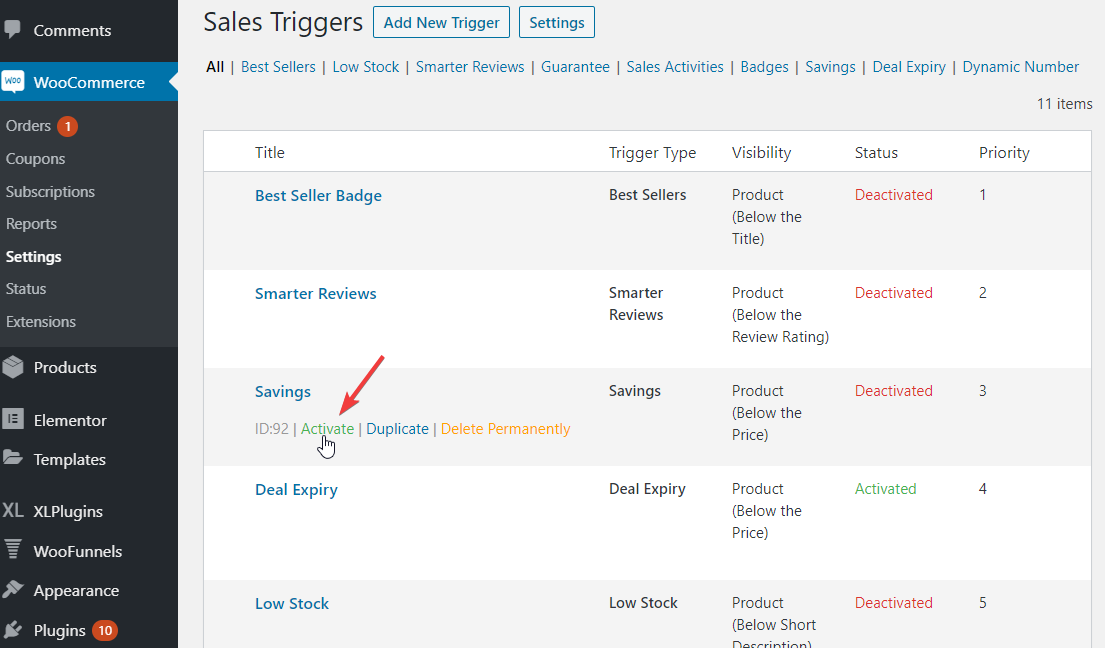
You’ll see the status change from ‘Deactivated’ to ‘Activated’.
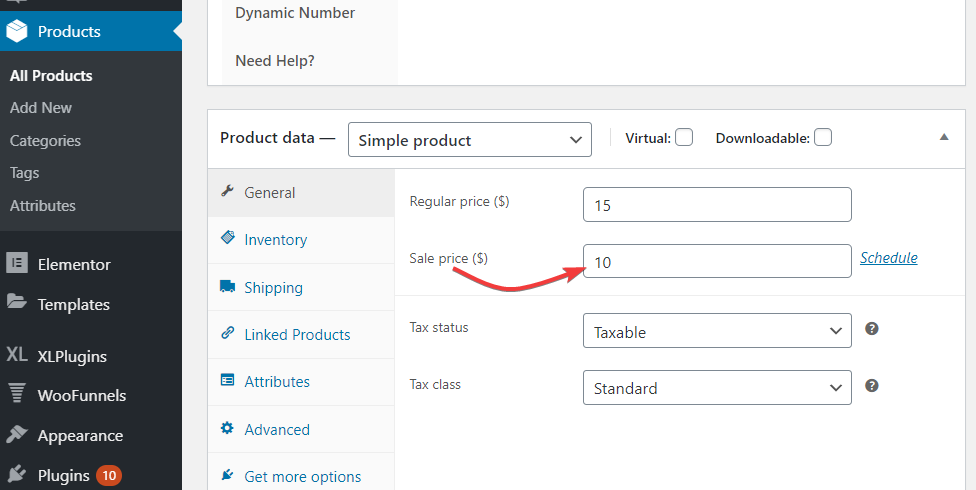
Step #2: Set the Sale Price for the Product
Go to WooCommerce > All Products > Edit Product
Then, set the sale price of the product.
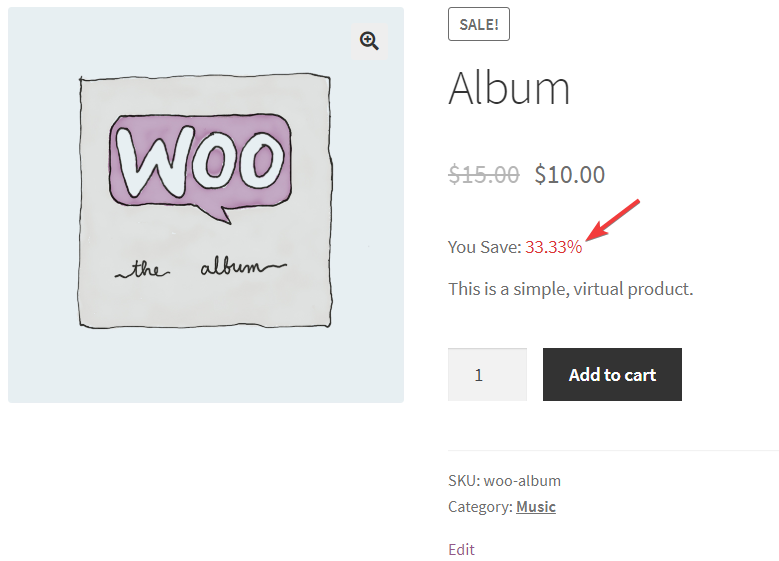
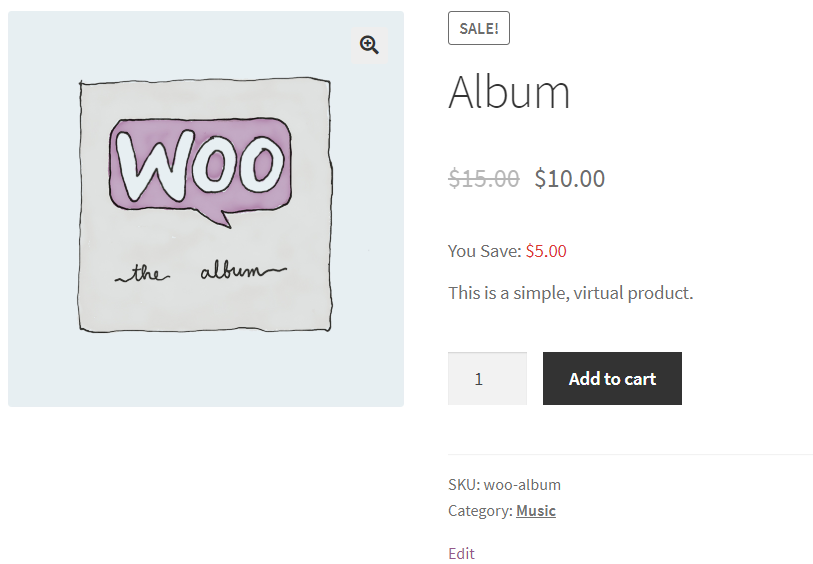
Now that you’ve set the sale price of the product, you’ll be able to see the Savings trigger in action.
Here’s how it appears:
Message Format
You can display savings in three different formats using merge tags.
{{savings_value_percentage}} displays savings in both price and percentage. For example: $10 (33%)

{{savings_value}} displays savings in price. For example: $10
{{savings_percentage}} displays savings in percentage. For example: 33%
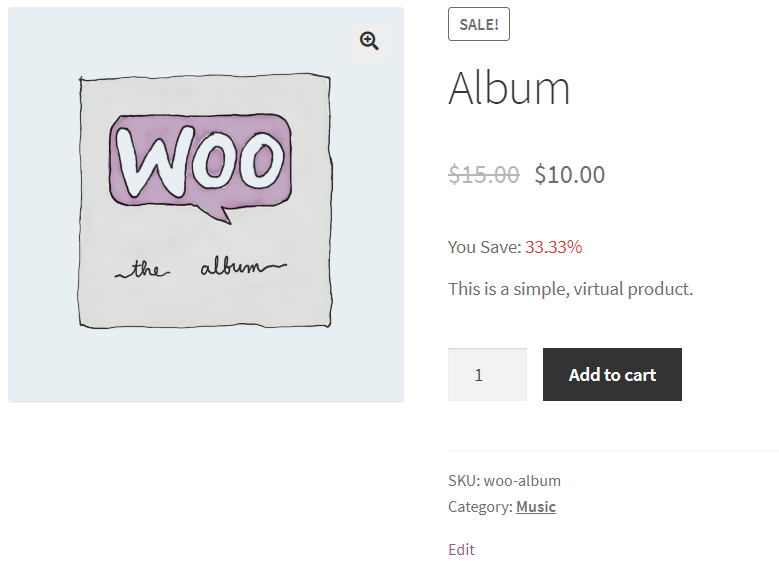
You Save: 10% ($15)
Buy Now & Save $15.
Get 15% off on this product
Settings
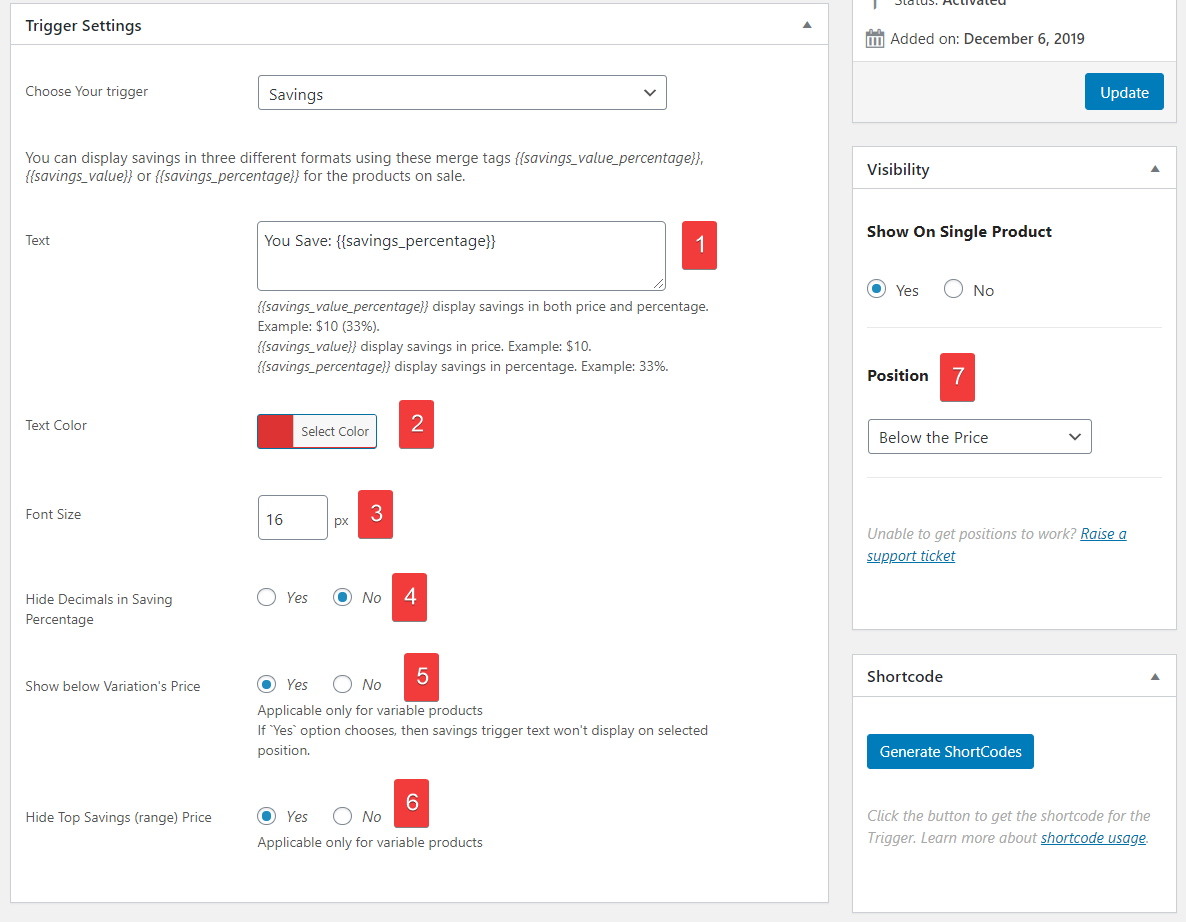
1. Modify text for Savings using merge tags.
2. Choose text color
3. Adjust font size
4. Hide the decimals when showing percentage savings
5. For Variable Products, each variation has its Regular Price & Sales Price. By selecting Yes, the Saving triggers will also appear below the price of each variation. On switching variations, the merge tag will display savings for the selected variant.
6. Hide the price savings at the top
7. Select the position to display this message.