This trigger is perfect to create urgency when limited period sales are set up for the products. You can set it up in one of the three modes: Time Left, End Date or Countdown Timer.
Basic Setup
To configure Deal Expiry trigger, make sure that you’ve performed these basic steps:
Step #1: Activate the Deal Expiry Trigger
Go to WooCommerce > Settings > Sales Triggers: XL Plugins
Scroll down to the Deal Expiry trigger and hit the ‘Activate’ button to activate it.

When you hit the ‘Activate’ button, the status of the trigger will change from ‘Deactivated’ to ‘Activated’.
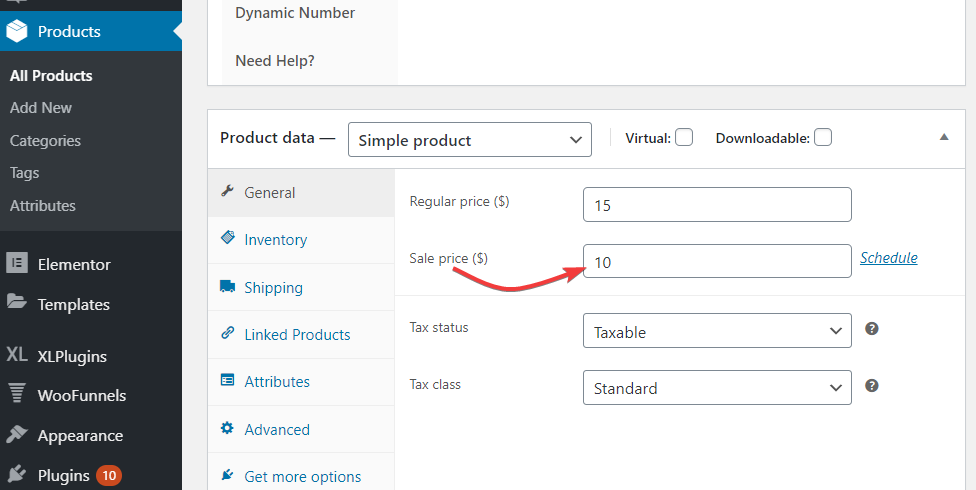
Step #2: Set the Sale Price for the Product
Go to WooCommerce > All Products
Here, select a product and click on ‘Edit’.
Next, set the sale price of the product.
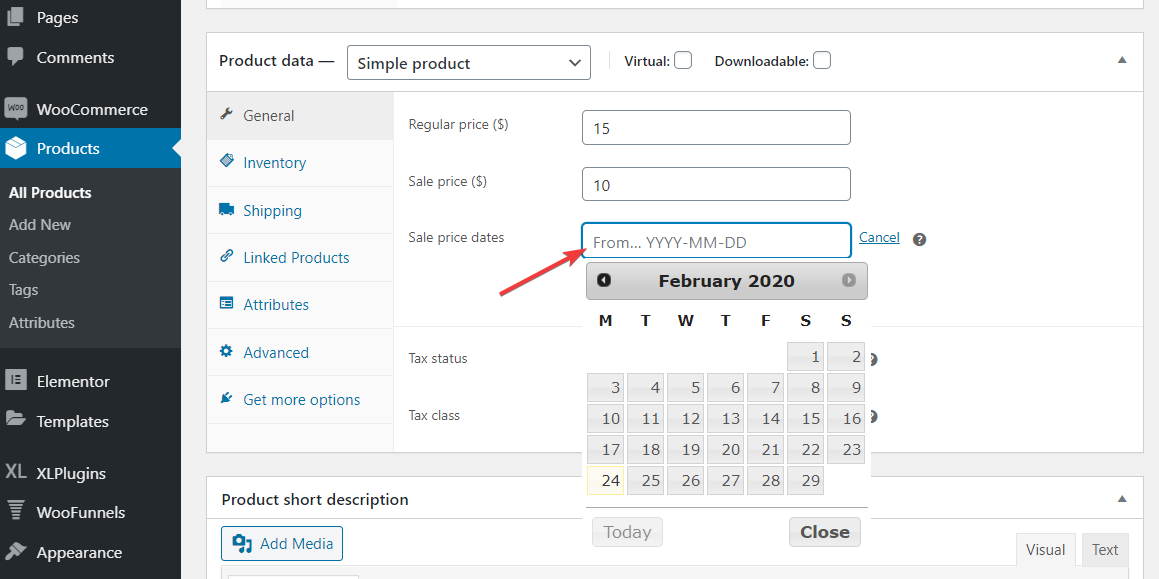
Step #3: Set the Time Period for the Product on Sale
In the ‘Edit product’ page, set the time period for which you want to activate the sale price.
Hit the ‘Schedule’ button placed beside the Sale price box.
Next, pick the ‘From’ and ‘To’ dates from the calendar to specify the time period.
That’s it. You’ve now done the basic setup to run the Deal Expiry trigger and can now tweak the trigger settings.
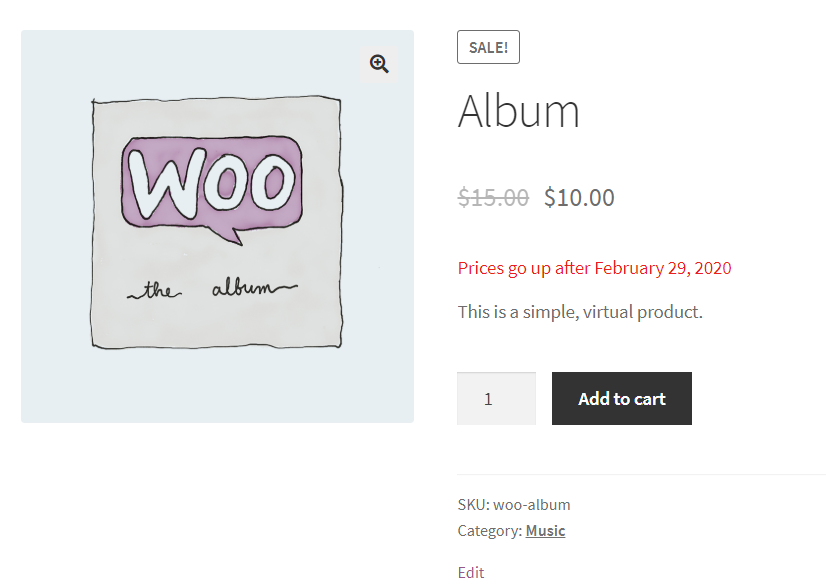
Here’s how it appears:
Modes
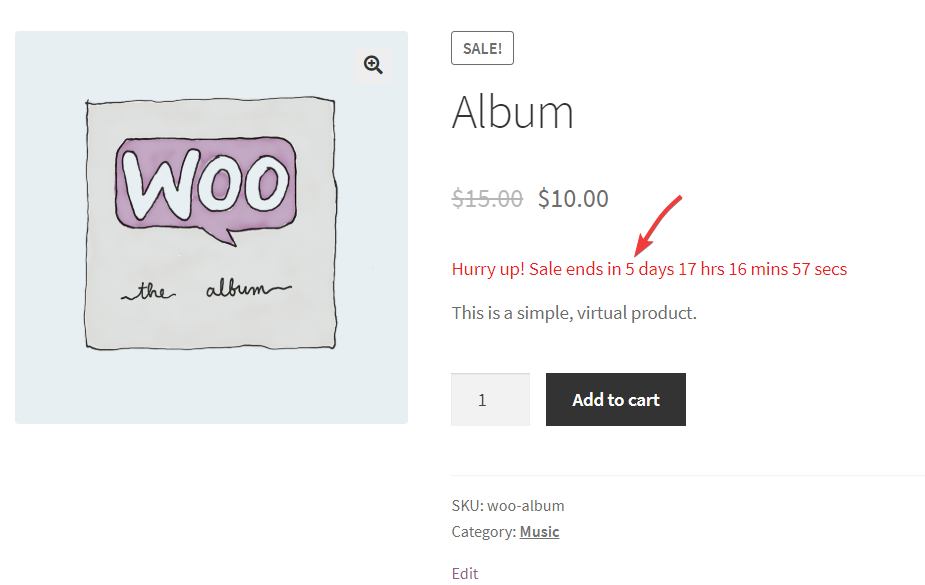
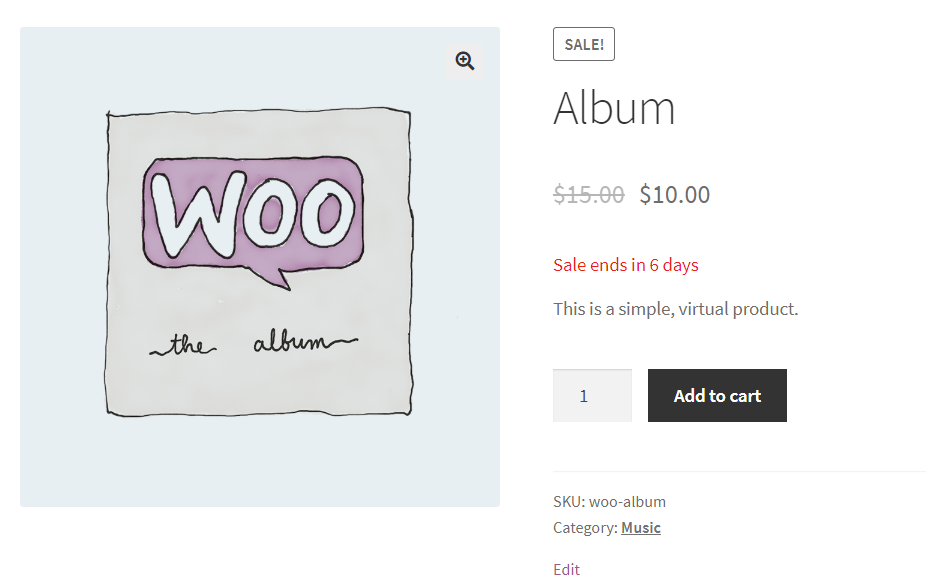
Time Left mode displays the time left for sale to end.
You can display custom messages like:
Sale Ends in 5 days. Hurry up!
Limited Period Sale for 1 week.
Just 21 hours left for the sale to end.
This mode uses merge tag {{time_left}} which displays as 1 week or 5 Days or 21 hours depending upon the time left for the sale to end.
End Date mode shows the Date when the sale ends.
You can display custom messages like:
Prices go up after 2017-01-18
Sale Ends on January 17, 2017
This mode uses merge tag {{end_date}} which displays the date in the format selected in Settings > General.
Countdown Timer mode time shows left for sale to end in reverse countdown mode.

You can display custom messages like:
Sale Ends In 6h 25m 03s (reverse ticking timer)
This mode uses merge tag {{countdown_timer}} which shows the reverse countdown timer.
You can automatically switch mode from Time Left/End Date to Countdown Timer when a few hours are left for the sale to end.
Settings
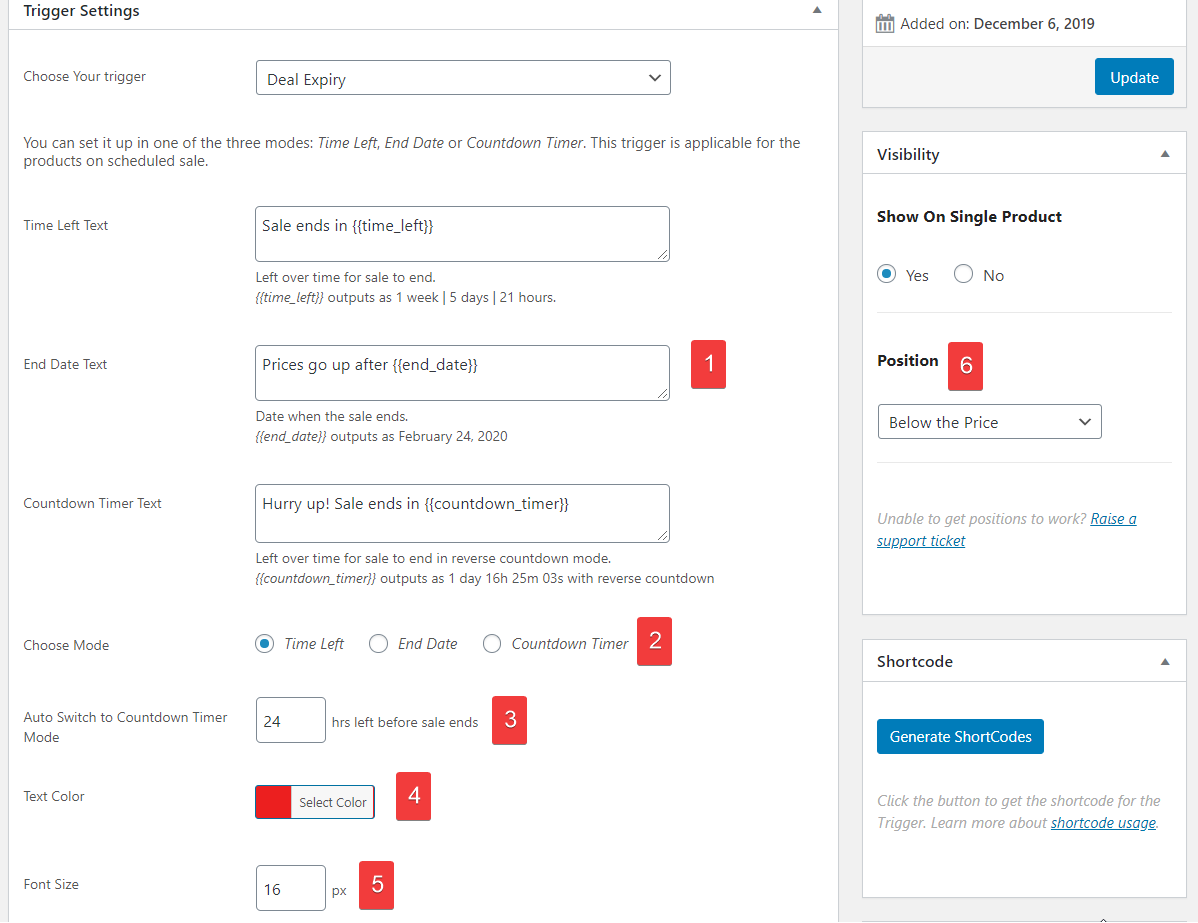
1. Modify text for each mode
2. Choose default mode
3. Automatically switch to Countdown Timer mode when few hours are left for sale to end
4. Choose text color
5. Adjust font size
6. Select the position to display this message
FAQ
Q. Will this trigger work if a product does not have scheduled sales?
A. No, this trigger only works when you have scheduled the sale.It’s recommended to make your sales time limited to create urgency.
Q. I have set up schedule and still, nothing shows up?
A.Try setting up Start Date in the past. Example if the current date is 12th February 2017 set the start date to 11th February 2017 and see if deal expiry trigger comes up.
Note: If you are looking to set up Bulk Scheduled Sales, please check out other product Finale.