How to Launch New & Upcoming Products With a Bang
Think about this:
Your store sells fashion accessories and you have new necklaces coming up. You’ve never sold that design before and maybe they’re a tad more expensive than what you sell.
You have their pictures BUT the items are still not stocked and ready to be sold.
Now you may quietly make them live on the store when you’re stocked up. But that won’t build hype, create excitement and make people wait for it.
Or go the Apple route. Build hype and create buzz around your upcoming products and convert this excitement into more sales. Let people know what you’re launching in advance and give them something to look forward to.
A simple yet systematic approach to creating buzz on your new launches is to start the countdown timer.
Put up the product description with high-resolution product images and start the countdown. The sight of the ticking countdown timer creates a sense of urgency. It lets people know there is something exciting under the wraps.
This creates an air of exclusivity around the product that can lead to more sales.
In addition to that, you can take a commitment from interested shoppers. For example, you may say ‘The product is soon hitting the shelf. Would you like us to notify you when it’s here?’
People who engage with you during the hype campaign are more likely to tune in once the product is finally available for purchase.
You can use Finale to build hype during pre-launch by configuring a countdown timer that runs till the date/time of launch. There many more nifty and powerful use cases that Finale lets you unleash. We’ll explore right here.
So here are the 7 steps to building a successful, sales-boosting hype around upcoming products using the ultimate urgency-inducing tool, Finale:
Contents
- Step #1: Set up a fixed campaign that starts on a set date/time and ends on the date/time of product launch
- Step #2: Set the ‘upcoming’ tag on the product and select that tag in the Rule Builder
- Step #3: Activate the countdown timer on the product page. Select the timer skin and color of your choice.
- Step #4: Update the settings and check visibility on front end
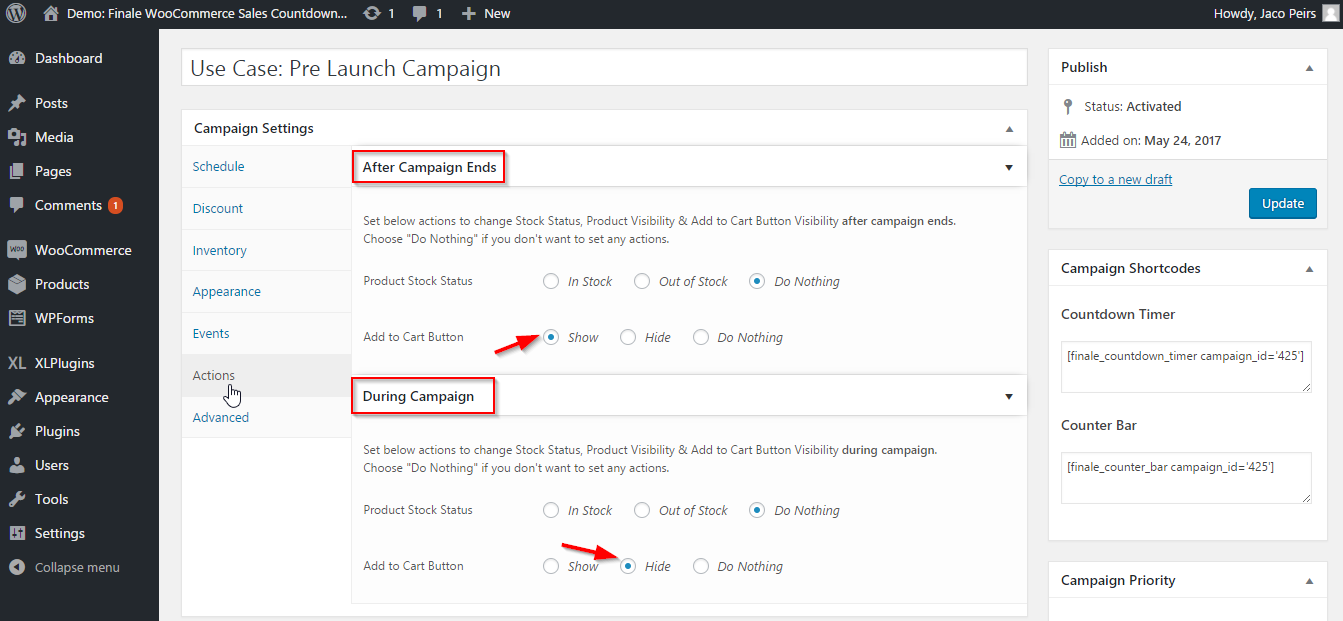
- Step #5: Go to the ‘Actions’ tab and set it up to hide the Add to Cart button during the campaign and show after the campaign ends
- [Optional] Step #6: Grab the short code and display the countdown timer on the launch announcement blog post
- [Optional] Step #7: Create a lead capturing form to gauge interest and grow your email list
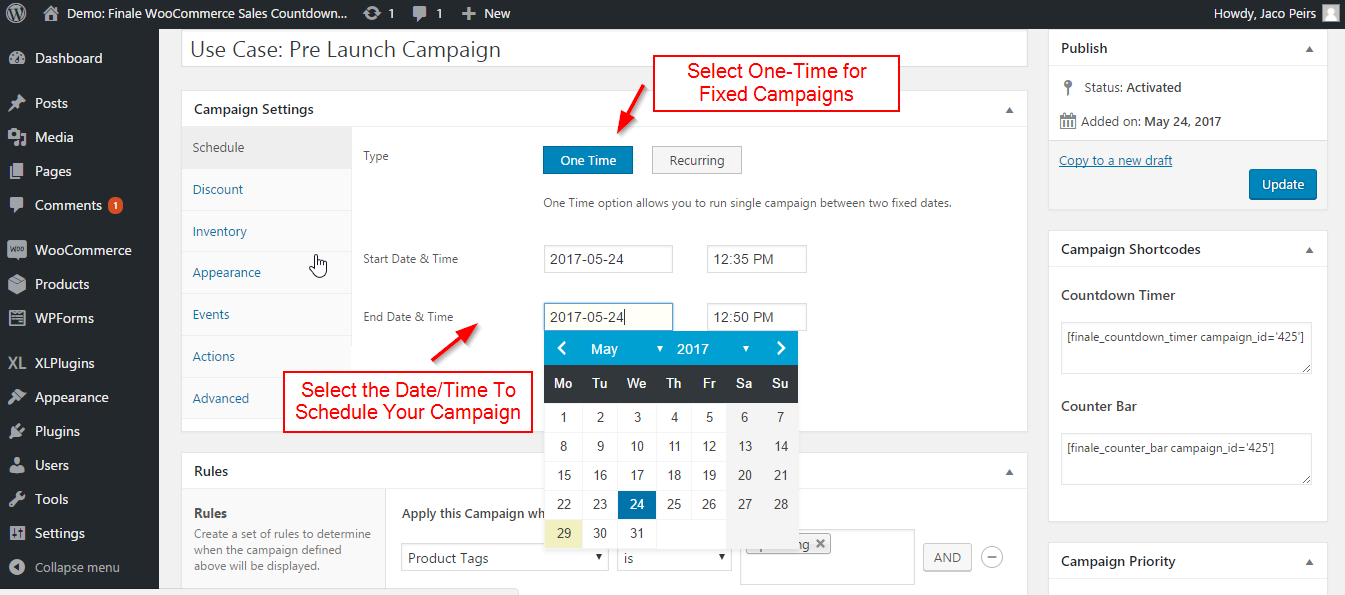
Step #1: Set up a fixed campaign that starts on a set date/time and ends on the date/time of product launch
Go to the Schedule Tab and start a campaign. As you can notice, there are two types of campaigns – One Time and Recurring. One time is fixed campaign that doesn’t restart whereas recurring campaign recurs after a specified interval of time.
Step #2: Set the ‘upcoming’ tag on the product and select that tag in the Rule Builder
The section that you can see in the image below is ‘Rule Builder’. It gives you access to 15 different conditions to set rules for your campaigns and customize them.
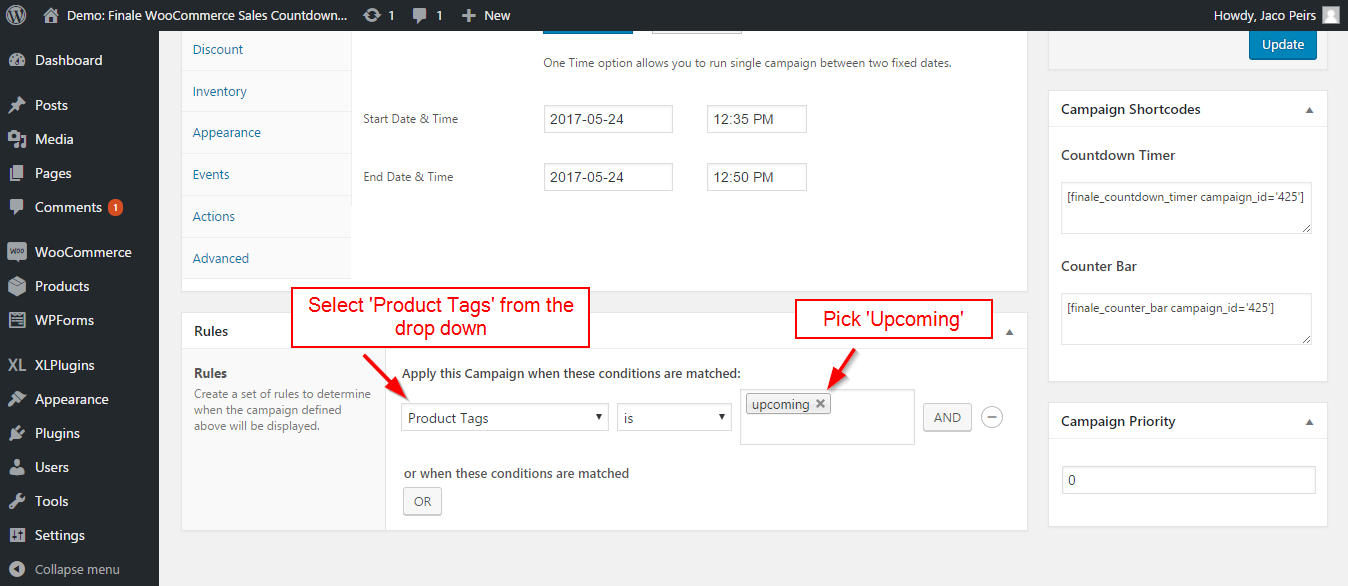
The campaign will only be activated on the product pages with upcoming tag. It would not run on any other product. Make sure you’ve marked the to-be-launched product with the ‘upcoming’ tag before hand.
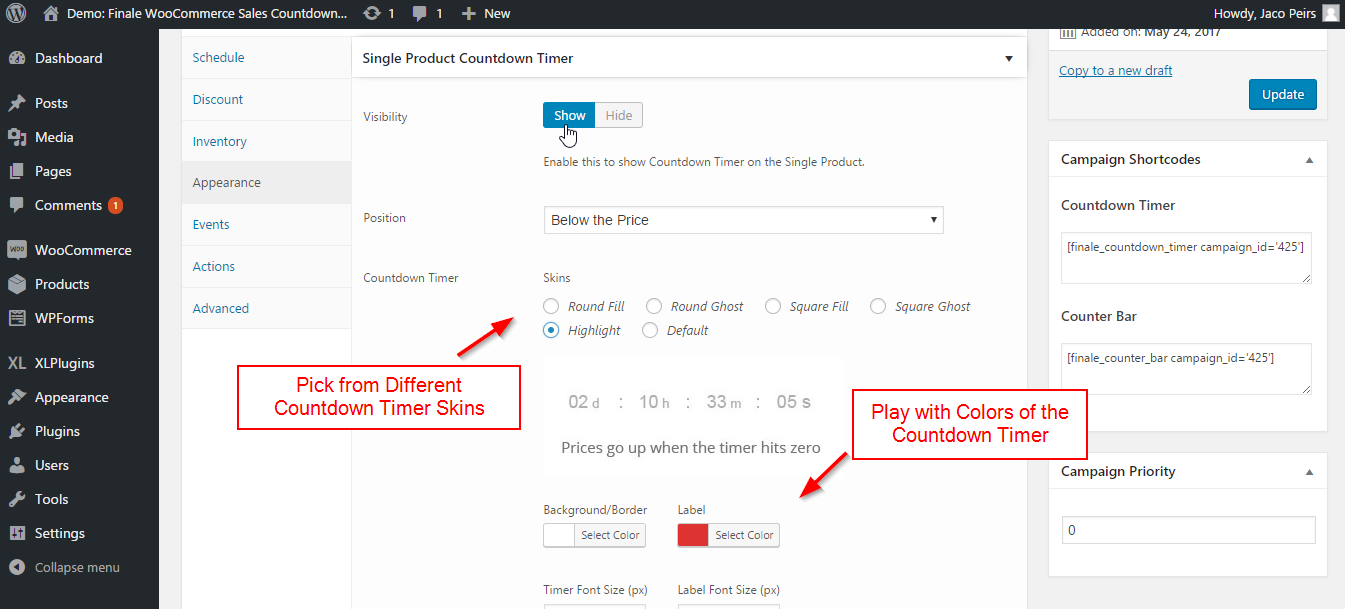
Step #3: Activate the countdown timer on the product page. Select the timer skin and color of your choice.
Go to the Appearance Tab from the sidebar >> Click Show for Countdown Timer
You’ll find many options to customize the countdown timer as per your store’s theme.
Moving on:
Change the countdown timer border, labels, font size and display text.
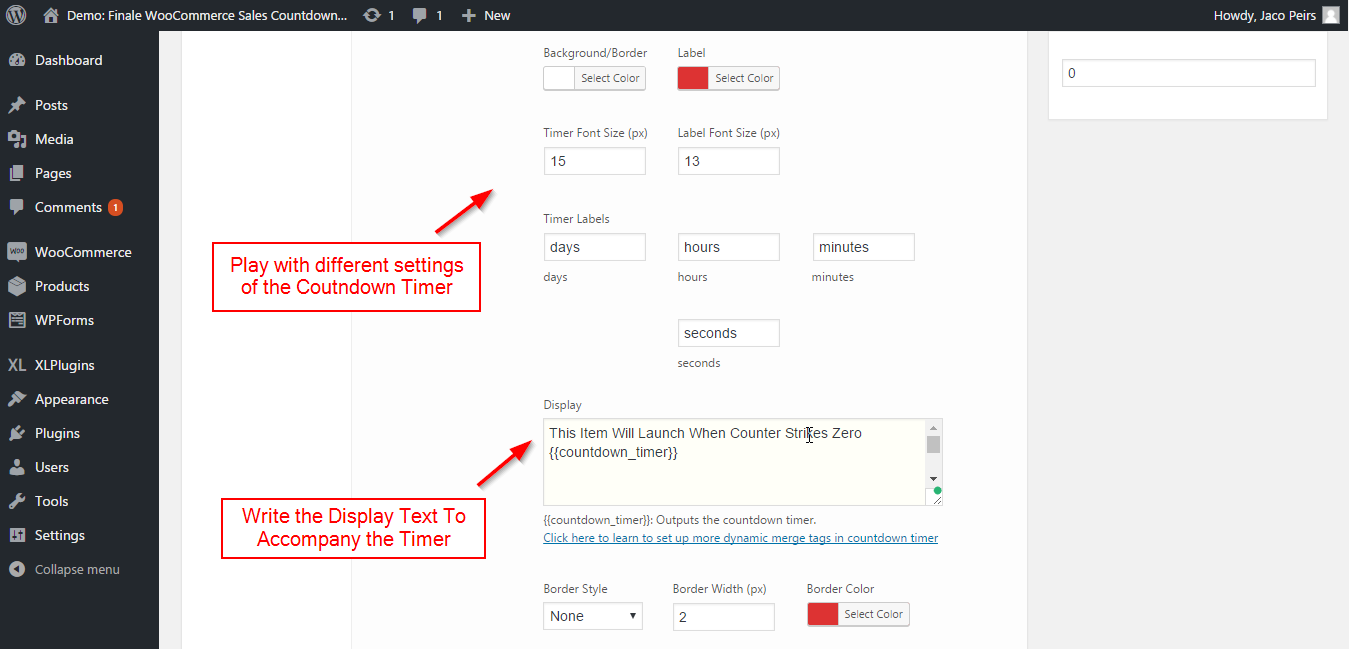
After doing all these settings, you’re now ready to check the visibility of the countdown timer on the front screen. In the next step, let’s update the settings and see how it appears.
Step #4: Update the settings and check visibility on front end
Notice the countdown timer below: 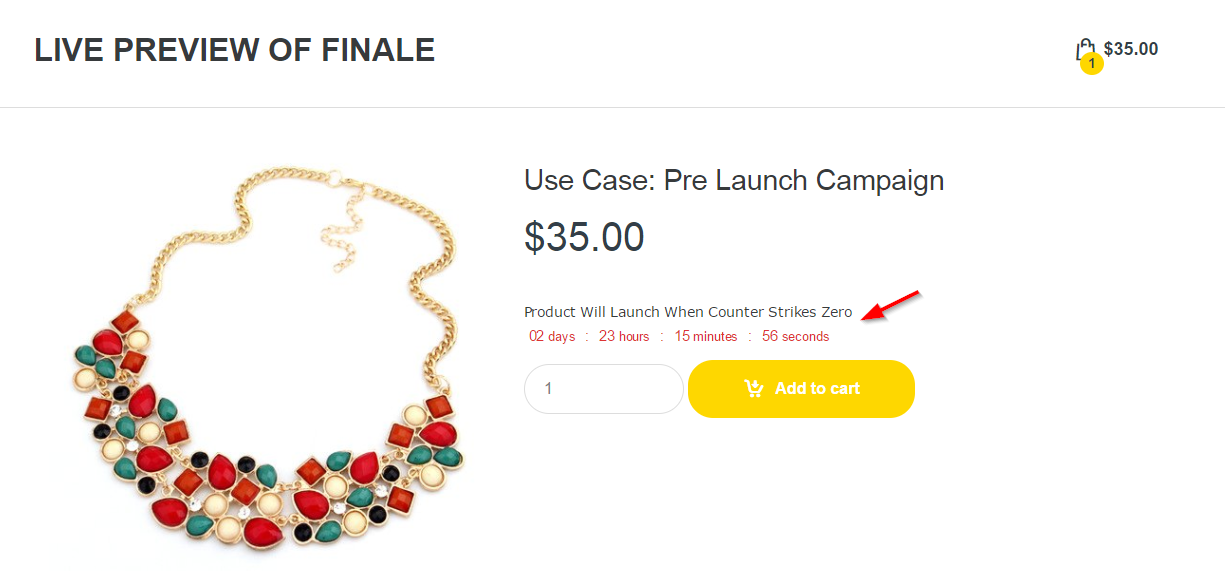
You’re most welcome to change the skin of the countdown timer based on what looks good on your store.
Also, you must notice that the ‘Add to Cart’ button is visible. But the product is not yet launched and hence it makes no sense to have the button still visible.
So what you want to do is hide the visibility during the campaign and let it get turned on, once the campaign expires.
That is exactly what we’ll configure in the next step:
Action is a tab on the sidebar in Finale. It has been designed to help you trigger actions on the fly.
[Optional] Step #6: Grab the short code and display the countdown timer on the launch announcement blog post
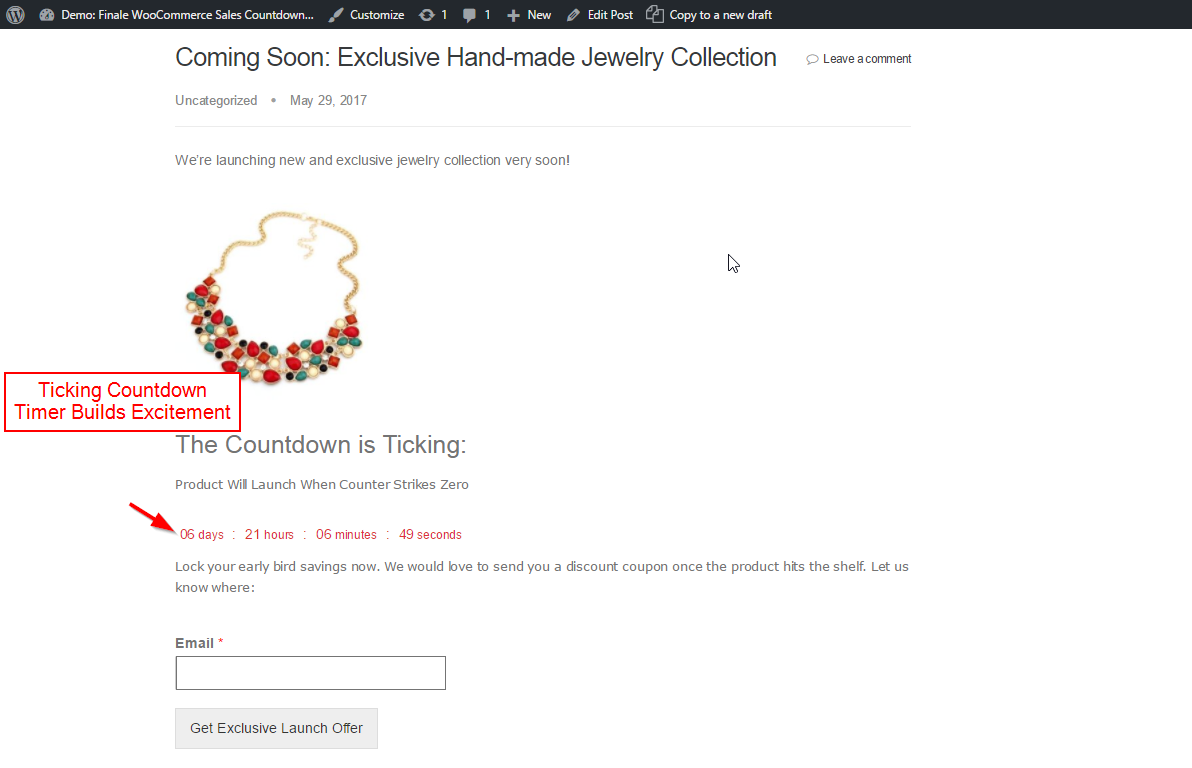
The shortcodes are on the right sidebar of the screen. Notice the ‘countdown timer’ shortcode on the right in the image above. You can simply copy the shortcode and paste them on dedicated landing pages, pop-ups, blog posts, blog sidebar to display the countdown timer.
We’ve copied and pasted the countdown timer shortcode on the blog post, which is announcing the arrival of a new product. Take a look at this:
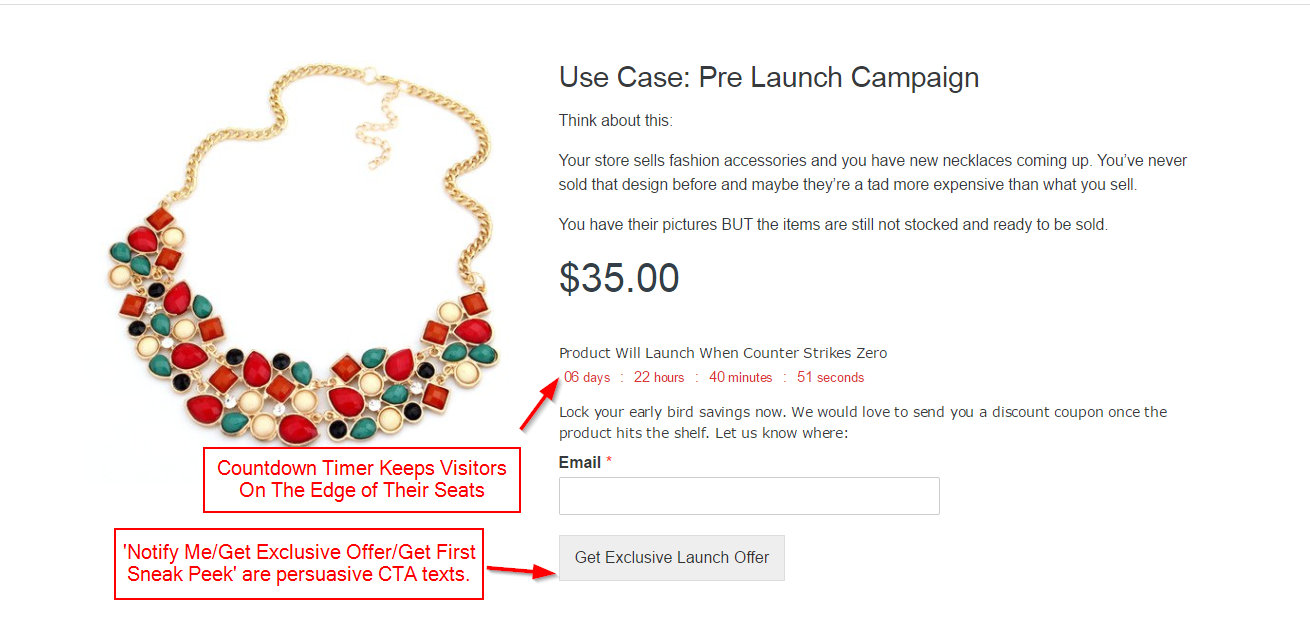
[Optional] Step #7: Create a lead capturing form to gauge interest and grow your email list
This step is optional but the email list building hack I’ve discussed here is quite effective. You can ask your visitors to leave their details if they want to be notified about the launch. This exclusivity makes people feel like insiders and part of your community. It’s gratifying and also makes people want to tune in when they receive an email from you.
Like what you just saw? Would love to replicate this on your store? Head out right away to Finale and explore.
Not sure if you’re ready? Don’t worry! We’ve stacked up several use cases of Finale for you. Go ahead and explore till you’re convinced Finale is the right fit for your store.