How to Create High-Converting Email Campaigns for Your WooCommerce Store
“I am not sure if sending out emails will get me sales”
Has that thought ever crossed your mind?
Well then don’t worry you’re not the only one. Inboxes are quite cluttered and it’s not easy to get a recipient to take the desired action.
Despite that, business owners who take the plunge and invest time and effort in email marketing get great traction from it.
Notice in the graph below how email marketing continues to lead and is even ahead of some of the most important sources of traffic and conversions like SEO and content marketing:
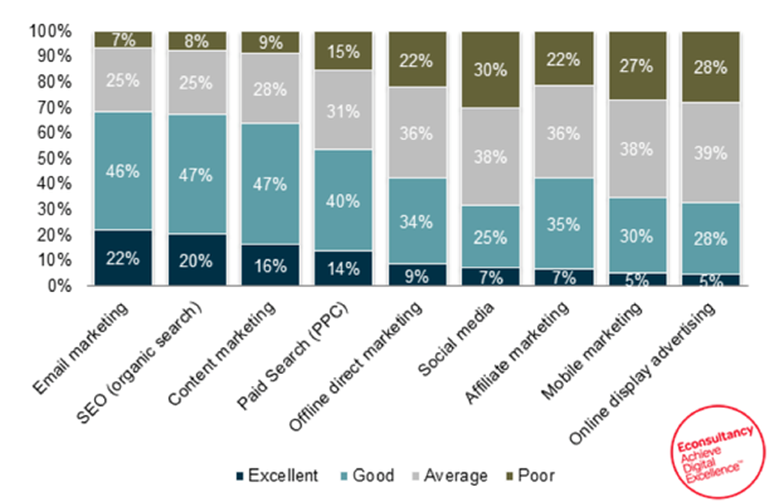
Email marketing was ranked as the best channel in terms of return on investment, with 68% of companies rating the channel as ‘good’ or ‘excellent’.
Source – eConsultancy
The best part?
It’s a cheap tool and doesn’t require you to spend mindless ad dollars.
In this video I’ll show you how to:
– Get the most out of the emails you send out to your subscribers
– Embed a countdown timer in your email so that it induces a sense of urgency in the reader
– Write micro copy for Flash Sale Emails that get people to act
– Carry forward the ‘conversation momentum’ from email to your store so that your messaging is consistent
All this and more right here:
As per an Experian report, flash-sale emails have at least 14% higher click-to-open rates, 59% higher transaction-to-click rates, and twice transaction rates compared to average marketing emails.
Don’t have the time to watch the video? No problem. Read below:
Case-Mate — a designer, manufacturer and retailer of premium smartphone cases — had never run a flash sale before. But their employees had seen other companies run successful flash sales. They were keen on running one in their store.
They launched a site-wide 12-hour flash sale from 7 P.M to 7 A.M and sent out emails to direct the traffic to their site. Email marketing was the chief driver of traffic.
And here are the results they got:
- 105% increase in conversion rate
- 78% increase in revenue
- And the biggest of all 236% increase in revenue!
In fact, just two weeks later they launched another flash sale and that too became a smash-hit success.
The reason why flash sales are so powerful is that they give shoppers are a credible reason to shop in that limited duration and enjoy the thrill of making instant savings.
If you too are leaning toward a flash sale, then you’re in for a treat! I am going to show you how to embed a countdown timer into your emails so that your subscribers don’t sleep on your email but actually take action.
Here’s an email template created by MailChimp and the countdown timer has been embedded using Finale:
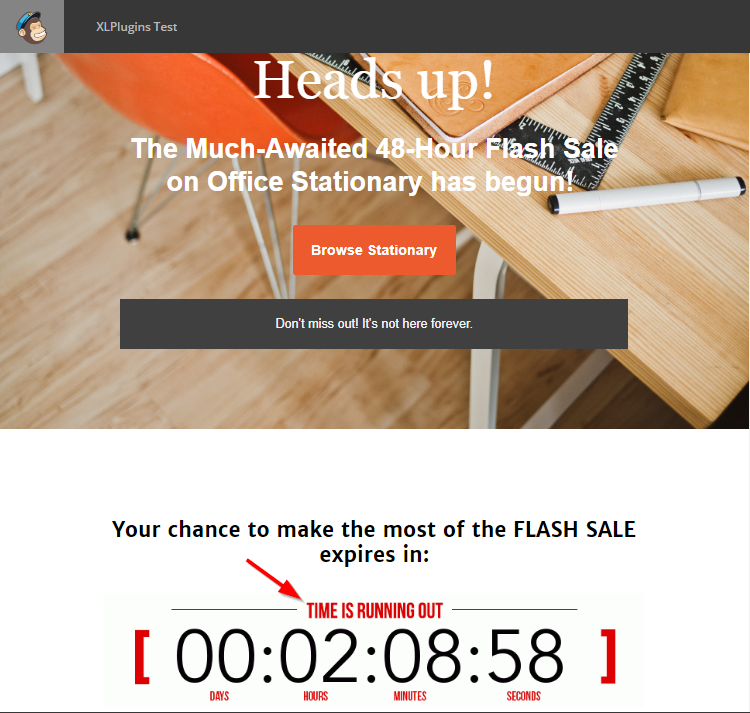
You must notice this flash sale is only applicable on a specific category i.e. office stationary, but of course, you have the option to run it sitewide too.
And when someone lands from this email or a similar post on Facebook/Instagram to your store, they sure won’t feel lost. Here’s how a sticky header spotlighting the flash sale looks in WooCommerce:

Noticed the Call to Action button? This button will quickly direct them to the stationary category page where the flash sale is on. They don’t have to hunt for the page; the sticky header sits on top of the site and subtly reminds them about the ongoing offer.
Now let me show you how to set this up:
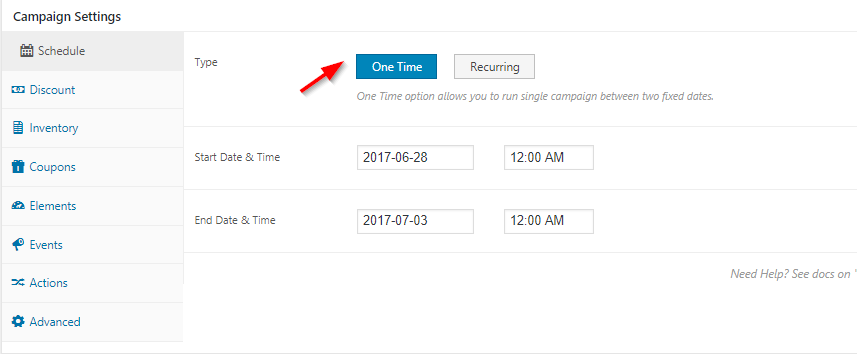
Step #1: Select the fixed date and time to run the flash sale
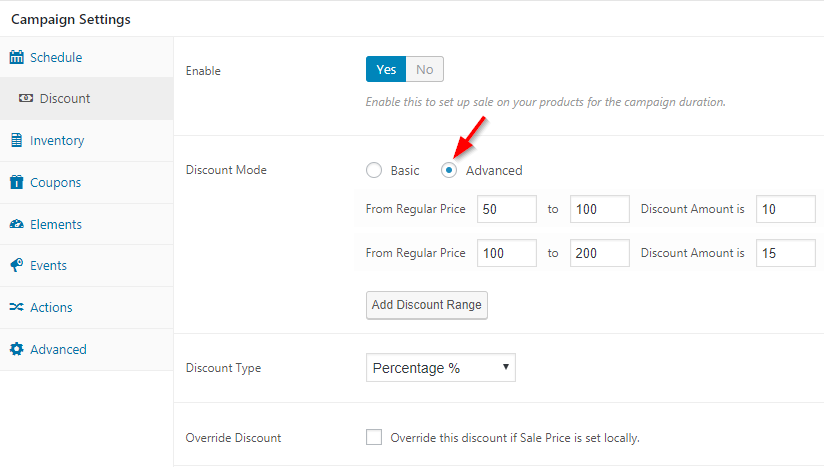
Step #2: Set up the discounts on your products
You’ll notice you have two options here:
1. Basic – This is for applying a single discount amount to different items
2. Advanced – To apply different discounts to different items based on their regular price
You can also select the discount type i.e. percentage or absolute value.
The next question is on which products or product category, you’d like to set the discounts.
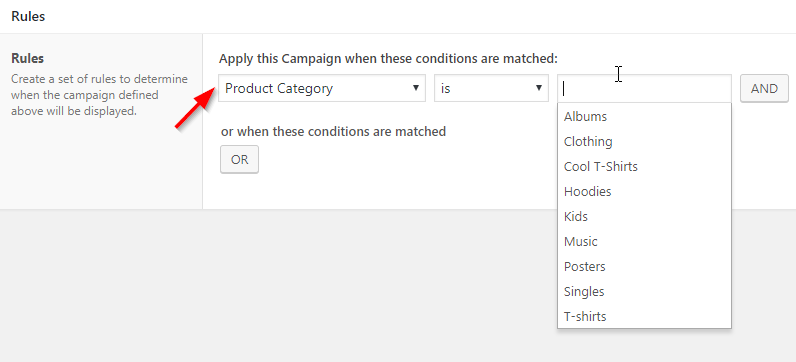
Step #3: Select the product category on which you want to apply the discounts
For this head out to the rule builder and select ‘Product category’ from the drop down.
Once you’ve selected that, you can pick from the product categories listed on your WooCommerce store.
The discount will only be applicable to all products in the chosen category.
Now that all this is set up, update the settings. You’ll now have the option to generate the timer.
Step #4: Click on generate timer and pick from the countdown timer skins
You’ll have a multitude of skin options to pick from, choose the ones you like best.
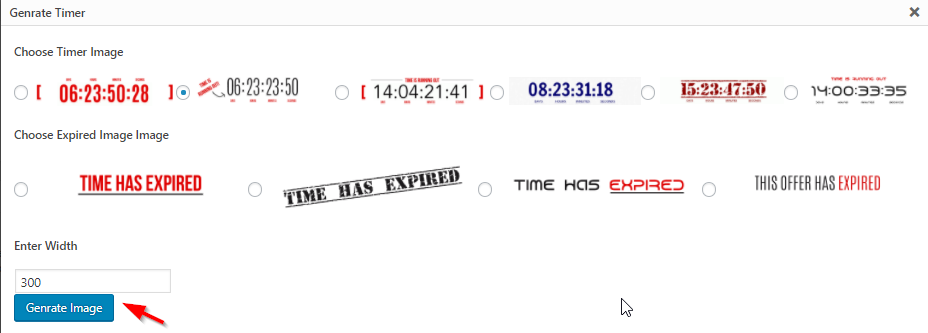
Pick the images, enter the width and generate the timer. You’ll now get a shortcode which is ready to be embedded in the emails.
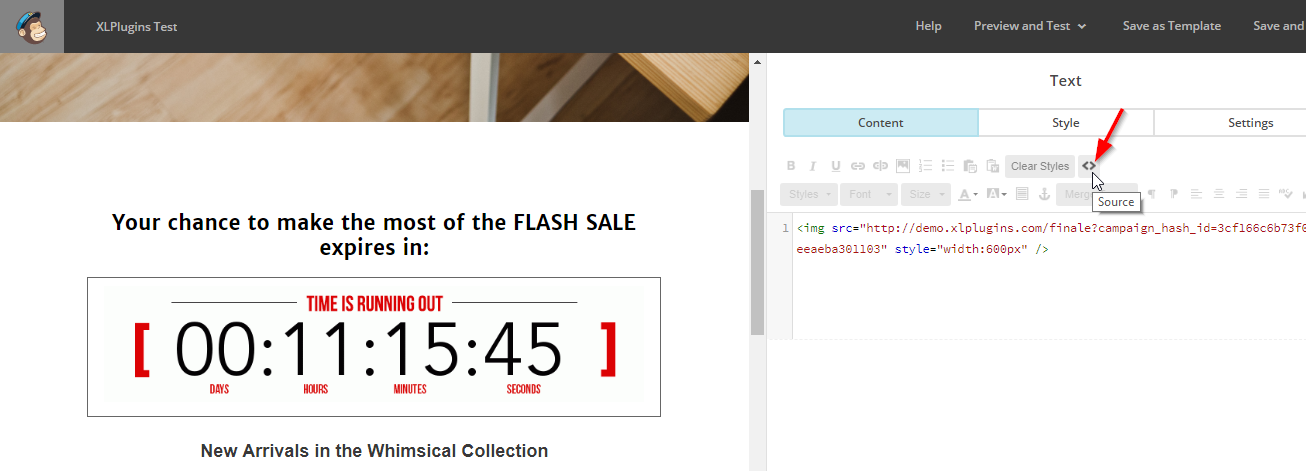
To embed this timer into MailChimp, select source and paste the shortcode.
Step #5: Grab the short code and embed the countdown timer in your emails
Select the ‘Source’ code option in MailChimp and paste the shortcode you have.
That’s it! You’re on roll.
Now in order to carry forward the conversation from emails/Facebook/Instagram posts to store’s home page, you may like to configure a sticky header.
I showed you how that looks in the image above. Let me take you to the backend and show you to set it up:
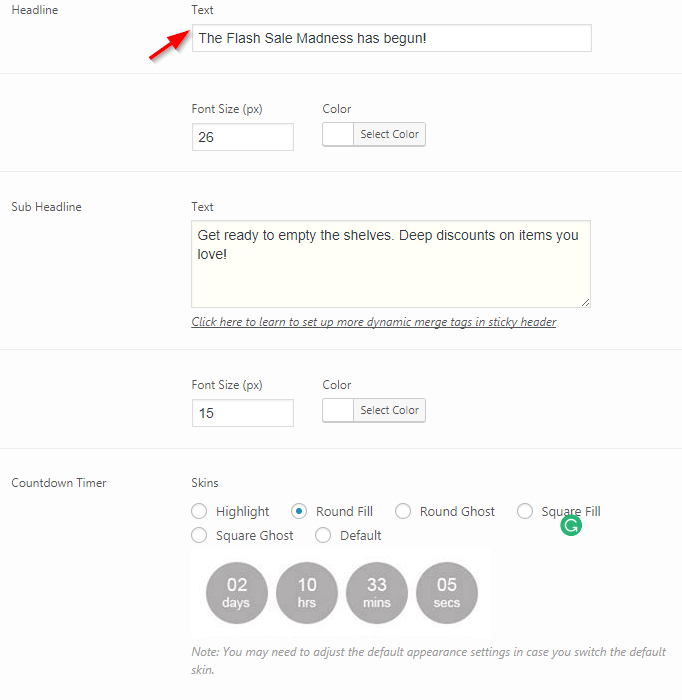 Just play with those options and you’ll have a stunning sticky header up in minutes. You can also configure the call to action button that directs people to the specific page with the offer.
Ready to see how Finale can help you sell more through urgency-inducing emails? Click here to discover.